Head and Shoulders
The Head and Shoulders is considered the most reliable bearish reversal formation in technical analysis.
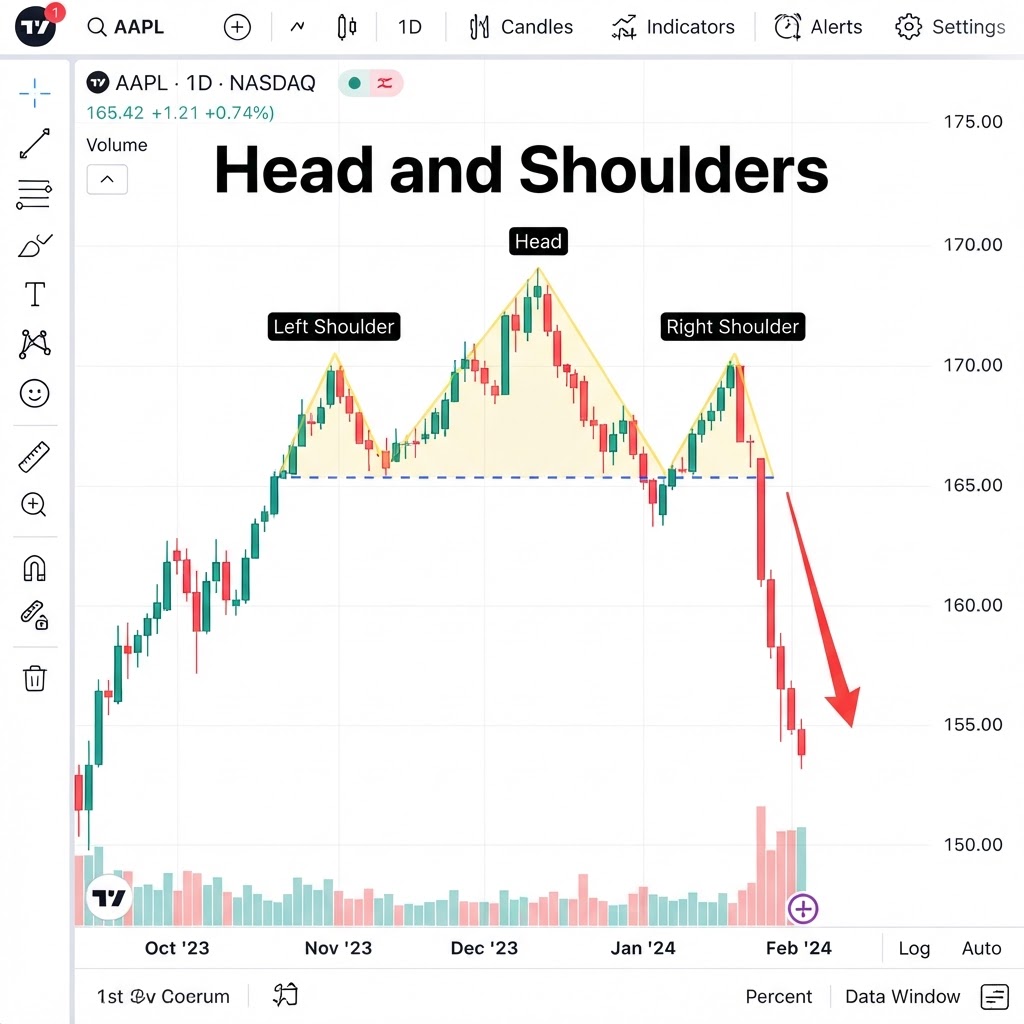
Realistic chart representation
Chart formations require multiple sessions to complete. The higher the timeframe, the more reliable the pattern. Do not anticipate: wait for breakout confirmation.
What is the Head and Shoulders pattern?
The Head and Shoulders is considered the most reliable bearish reversal formation in technical analysis. It's composed of three peaks: the left shoulder (minor peak), the head (higher central peak) and the right shoulder (peak similar to the left). The neckline connects the two lows between the three peaks. The neckline break downward confirms the formation and projects a price target equal to the distance from the head to the neckline.
How do you trade Head and Shoulders?
Why does the Head and Shoulders pattern work?
Head and Shoulders is one of the most famous and reliable chart formations in technical analysis. It's a bearish reversal pattern that forms after an extended uptrend and consists of three peaks: a left shoulder, a higher head, and a right shoulder that is lower than the head and approximately at the same level as the left shoulder. The 'neckline' connects the lows between the shoulders and the head, and a break below this neckline confirms the pattern.
The pattern's power comes from the story it tells about the progressive loss of bullish momentum. The left shoulder shows strong buying (high peak). The head shows even stronger buying (higher peak) — but this is the climax. The right shoulder shows weaker buying (lower peak) — the bulls can no longer reach the previous highs. This 'lower high' is the first structural sign that the uptrend is exhausting.
The neckline is the critical level. It can be horizontal, ascending, or descending — a descending neckline is the most bearish because it shows that even the pullback lows are getting lower. The pattern is confirmed only when price breaks below the neckline with volume. The projected target is the distance from the head's peak to the neckline, measured downward from the breakout point. This target is a minimum expectation — many Head and Shoulders patterns exceed their targets in strong bear markets.